Harry Herring
Kits
-
LIVID-1 6 inch frame
$ 34.90What do you get when you lock a lunatic FPV pilot in their room without their ADHD meds and with 2 large packets of haribo. The LIVID-1. Created with love (and autism), it wasn't designed to be the newest, hottest thing on the market, beating out the alien's and chameleon's of the world. This was designed to be a
kickasspretty ok frame for peanuts, and is 100% not a clone. Made in 5", 6" and 7" variants, this is one of the first frames for long range flying that wont take your wallet, set it on fire then stamp on the remainsThe design was inspired by the QAV-Skitzo, a frame i've been flying for 8 months now. I found it had some oversights what i wasn't a fan of. The main one being camera protection, which was unacceptable on the skitzo. Before i desinged and printed a reinforment piece i was smashing cameras left and right, and i dont go out for a fly without at least 2 spare reinforcing plates now.
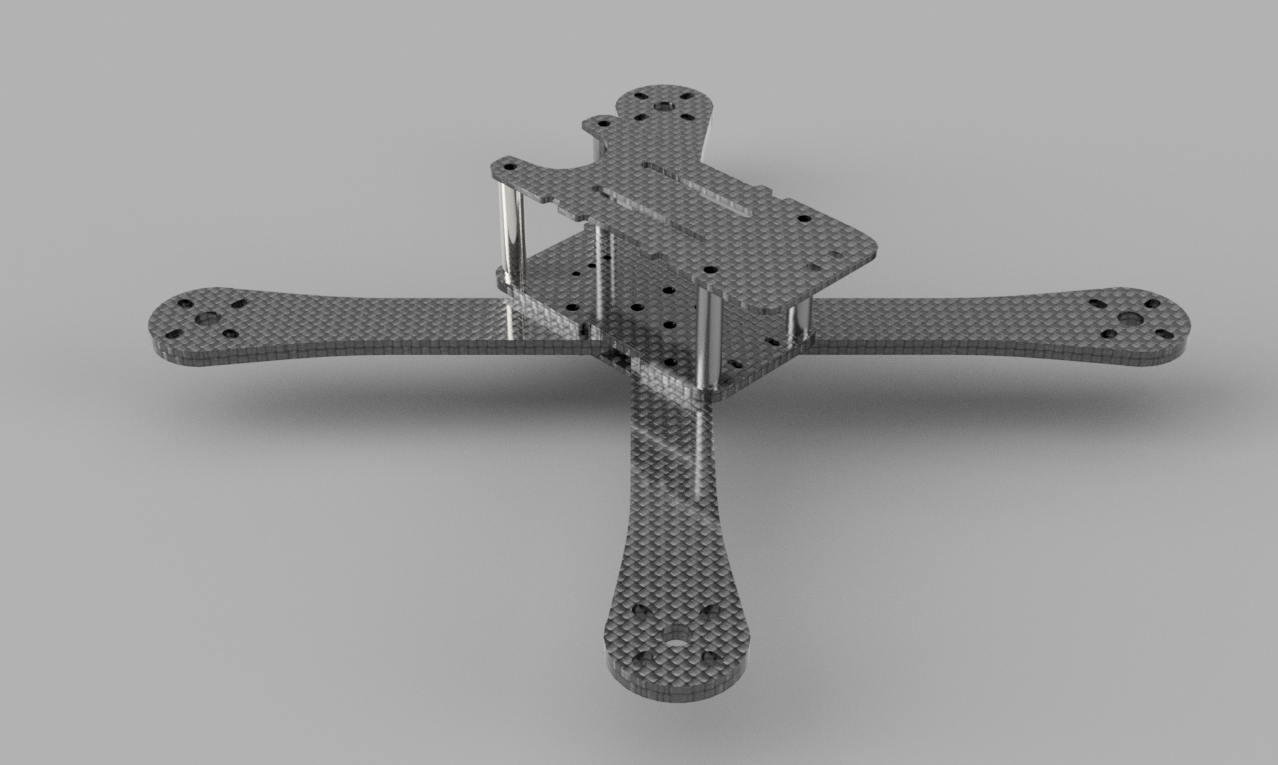
The arms are simple, no fancy cutouts, 17mm wide, 4mm thick. This frame would suit a beginner, so i made them nice and thick at the cost of weight on the 5" and 6" variants, but a bit narrower on the 7in variants, as people who do long range are usually not starting out, and you're much less likely to crash a long range machine. All the arms are identical, some frames require you to carry around 2 sets of arms, not this one.
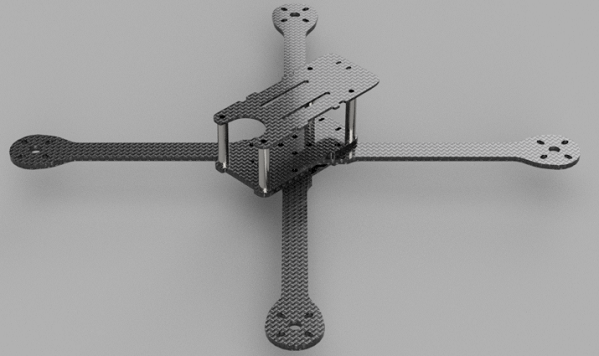
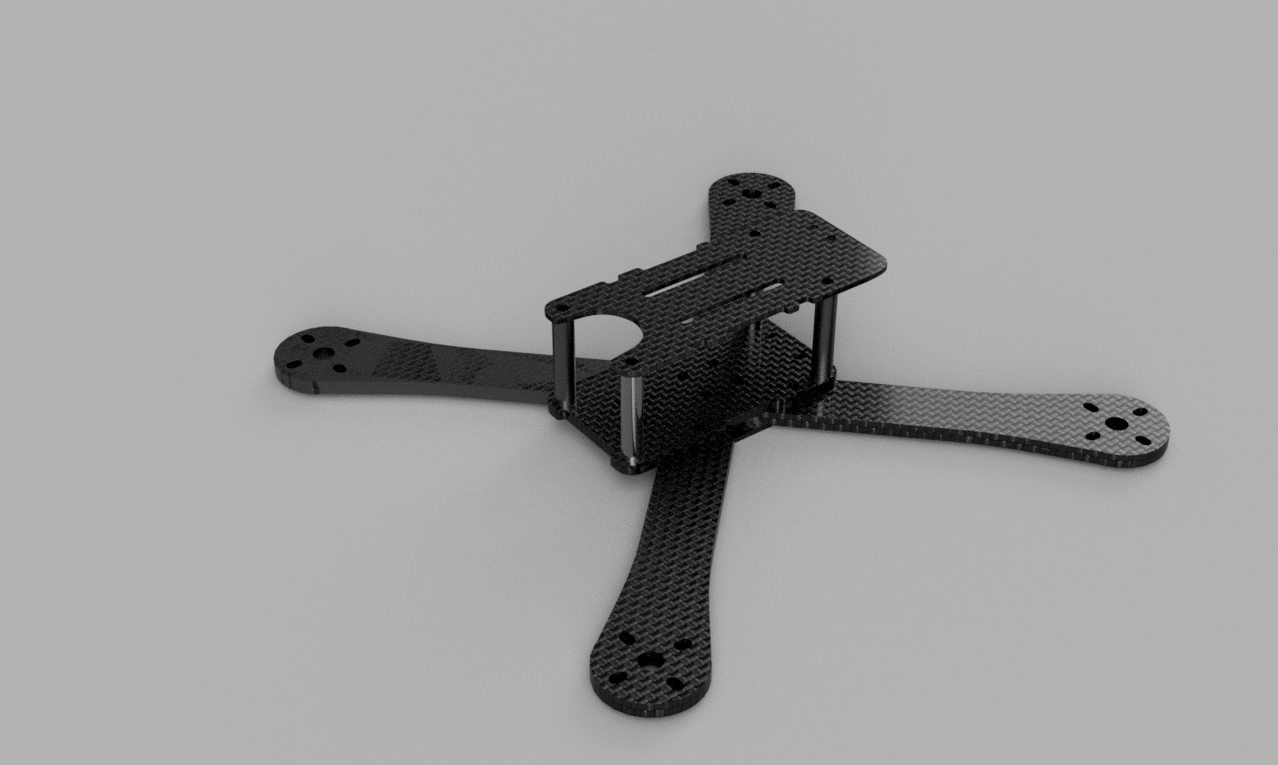
The arms are attached to the base plate in a sandwich, with a 1.5mm plate on the bottom to stiffen it up a bit, if you're seeking minimum weight on 7in then fell brave enough to remove that plate. The 3mm base plate itself uses high quality captive nuts similar to the astrox frames for ease of assembly, none of those fiddly aluminium brackets such as on lumenier frames. The outer holes also form the mounts for the fc stack, use the included nylon nuts to space it up a it, or just put the nuts in your spare pats box. Even though this is a bargain basement frame, I also inclde a set of standoffs for the fc and some nuts to go on top. It's the little things that matter. FPV camera mounting is handled by by the set of 3 2mm holes on the base plate, which are suitable to mount all the fpv camera included metal brackets i could find the dimensions of. I would have designed camera plates, but manufacturing limitations put a stop to that idea very quickly. The camera mount is fairly far back in the frame, to protect the camera as much as possible, and a pair of m2 screws of adequate length are included in the kit, use the m2 nuts that come in the box with all runcam cameras (and most others i'm sure) to secure the mount in place
Because no camera plates are used, the 2mm top plate can be placed on whatever length standoffs you like. For this kit i selected 24mm standoffs, but feel free to go up or down as you please if you want to use a powercube, or slam it with an aio board. The top plate is longer than the bottom, to allow for a top mounted battery if you so desire. depending on your choice of fpv camera lens you should be able to fit a 1300 up top with 30-45 degress of cam tilt. If you are using the 7 inch variant, an HD cam, bigger batteries than a 1300 or want to crank the tilt way up, there is a cutout for a battery strap for the bottom too. The top plate is cut out to handle some fairly insane tilt levels, and has some ziptie slots for the vtx or an hd cam mount or both. There is also a set of slots for the sma pigtail, but I have also designed a tpu piece for the TBS unify VTX's that fits the pigtail, and has slots for rx antenna mounting. Email me at livid.fpv@gmail.com if you want that piece, as armattan don't do printing.
-
LIVID-1 7 inch frame 4mm arms
$ 33.13What do you get when you lock a lunatic FPV pilot in their room without their ADHD meds and with 2 large packets of haribo. The LIVID-1. Created with love (and autism), it wasn't designed to be the newest, hottest thing on the market, beating out the alien's and chameleon's of the world. This was designed to be a
kickasspretty ok frame for peanuts, and is 100% not a clone. Made in 5", 6" and 7" variants, this is one of the first frames for long range flying that wont take your wallet, set it on fire then stamp on the remainsThe design was inspired by the QAV-Skitzo, a frame i've been flying for 8 months now. I found it had some oversights what i wasn't a fan of. The main one being camera protection, which was unacceptable on the skitzo. Before i desinged and printed a reinforment piece i was smashing cameras left and right, and i dont go out for a fly without at least 2 spare reinforcing plates now.
The arms are simple, no fancy cutouts, 12mm wide, 4mm thick. This variant uses narrower arms to save weight, as people who do long range are usually not starting out, and you're much less likely to crash a long range machine. All the arms are identical, some frames require you to carry around 2 sets of arms, not this one.
The arms are attached to the base plate in a sandwich, with a 1.5mm plate on the bottom to stiffen it up a bit, if you're seeking minimum weight and feel brave enough then remove that plate. The 3mm base plate itself uses high quality captive nuts similar to the astrox frames for ease of assembly, none of those fiddly aluminium brackets such as on lumenier frames. The outer holes also form the mounts for the fc stack, use the included nylon nuts to space it up a it, or just put the nuts in your spare pats box. Even though this is a bargain basement frame, I also inclde a set of standoffs for the fc and some nuts to go on top. It's the little things that matter. FPV camera mounting is handled by by the set of 3 2mm holes on the base plate, which are suitable to mount all the fpv camera included metal brackets i could find the dimensions of. I would have designed camera plates, but manufacturing limitations put a stop to that idea very quickly. The camera mount is fairly far back in the frame, to protect the camera as much as possible, and a pair of m3 screws of adequate length and nuts are included in the kit, it fits all the brackets i could find the designs for in one way or another. but it suits mini/micro cams due to the standoffs.
Because no camera plates are used, the 2mm top plate can be placed on whatever length standoffs you like. For this kit i selected 24mm standoffs, but feel free to go up or down as you please if you want to use a powercube, or slam it with an aio board. The top plate is longer than the bottom, to allow for a top mounted battery if you so desire. depending on your choice of fpv camera lens you should be able to fit a 1300 up top with 30-45 degress of cam tilt. If you are using the 7 inch variant, an HD cam, bigger batteries than a 1300 or want to crank the tilt way up, there is a cutout for a battery strap for the bottom too. The top plate is cut out to handle some fairly insane tilt levels, and has some ziptie slots for the vtx or an hd cam mount or both. There is also a set of slots for the sma pigtail, but I have also designed a tpu piece for the TBS unify VTX's that fits the pigtail, and has slots for rx antenna mounting. Email me at livid.fpv@gmail.com if you want that piece, as armattan don't do printing.
-
LIVID-1 5 inch frame
$ 31.83What do you get when you lock a lunatic FPV pilot in their room without their ADHD meds and with 2 large packets of haribo. The LIVID-1. Created with love (and autism), it wasn't designed to be the newest, hottest thing on the market, beating out the alien's and chameleon's of the world. This was designed to be a
kickasspretty ok frame for peanuts, and is 100% not a clone. Made in 5", 6" and 7" variants, this is one of the first frames for long range flying that wont take your wallet, set it on fire then stamp on the remainsThe design was inspired by the QAV-Skitzo, a frame i've been flying for 8 months now. I found it had some oversights what i wasn't a fan of. The main one being camera protection, which was unacceptable on the skitzo. Before i desinged and printed a reinforment piece i was smashing cameras left and right, and i dont go out for a fly without at least 2 spare reinforcing plates now.
The arms are simple, no fancy cutouts, 17mm wide, 4mm thick. This frame would suit a beginner, so i made them nice and thick at the cost of weight on the 5" and 6" variants, but a bit narrower on the 7in variants, as people who do long range are usually not starting out, and you're much less likely to crash a long range machine. All the arms are identical, some frames require you to carry around 2 sets of arms, not this one.
The arms are attached to the base plate in a sandwich, with a 1.5mm plate on the bottom to stiffen it up a bit, if you're seeking minimum weight on 7in then fell brave enough to remove that plate. The 3mm base plate itself uses high quality captive nuts similar to the astrox frames for ease of assembly, none of those fiddly aluminium brackets such as on lumenier frames. The outer holes also form the mounts for the fc stack, use the included nylon nuts to space it up a it, or just put the nuts in your spare pats box. Even though this is a bargain basement frame, I also inclde a set of standoffs for the fc and some nuts to go on top. It's the little things that matter. FPV camera mounting is handled by by the set of 3 2mm holes on the base plate, which are suitable to mount all the fpv camera included metal brackets i could find the dimensions of. I would have designed camera plates, but manufacturing limitations put a stop to that idea very quickly. The camera mount is fairly far back in the frame, to protect the camera as much as possible, and a pair of m2 screws of adequate length are included in the kit, use the m2 nuts that come in the box with all runcam cameras (and most others i'm sure) to secure the mount in place
Because no camera plates are used, the 2mm top plate can be placed on whatever length standoffs you like. For this kit i selected 24mm standoffs, but feel free to go up or down as you please if you want to use a powercube, or slam it with an aio board. The top plate is longer than the bottom, to allow for a top mounted battery if you so desire. depending on your choice of fpv camera lens you should be able to fit a 1300 up top with 30-45 degress of cam tilt. If you are using the 7 inch variant, an HD cam, bigger batteries than a 1300 or want to crank the tilt way up, there is a cutout for a battery strap for the bottom too. The top plate is cut out to handle some fairly insane tilt levels, and has some ziptie slots for the vtx or an hd cam mount or both. There is also a set of slots for the sma pigtail, but I have also designed a tpu piece for the TBS unify VTX's that fits the pigtail, and has slots for rx antenna mounting. Email me at livid.fpv@gmail.com if you want that piece, as armattan don't do printing.
