Adrian Keil
Kits
-
T-Beam Frame 4 inch - opensource
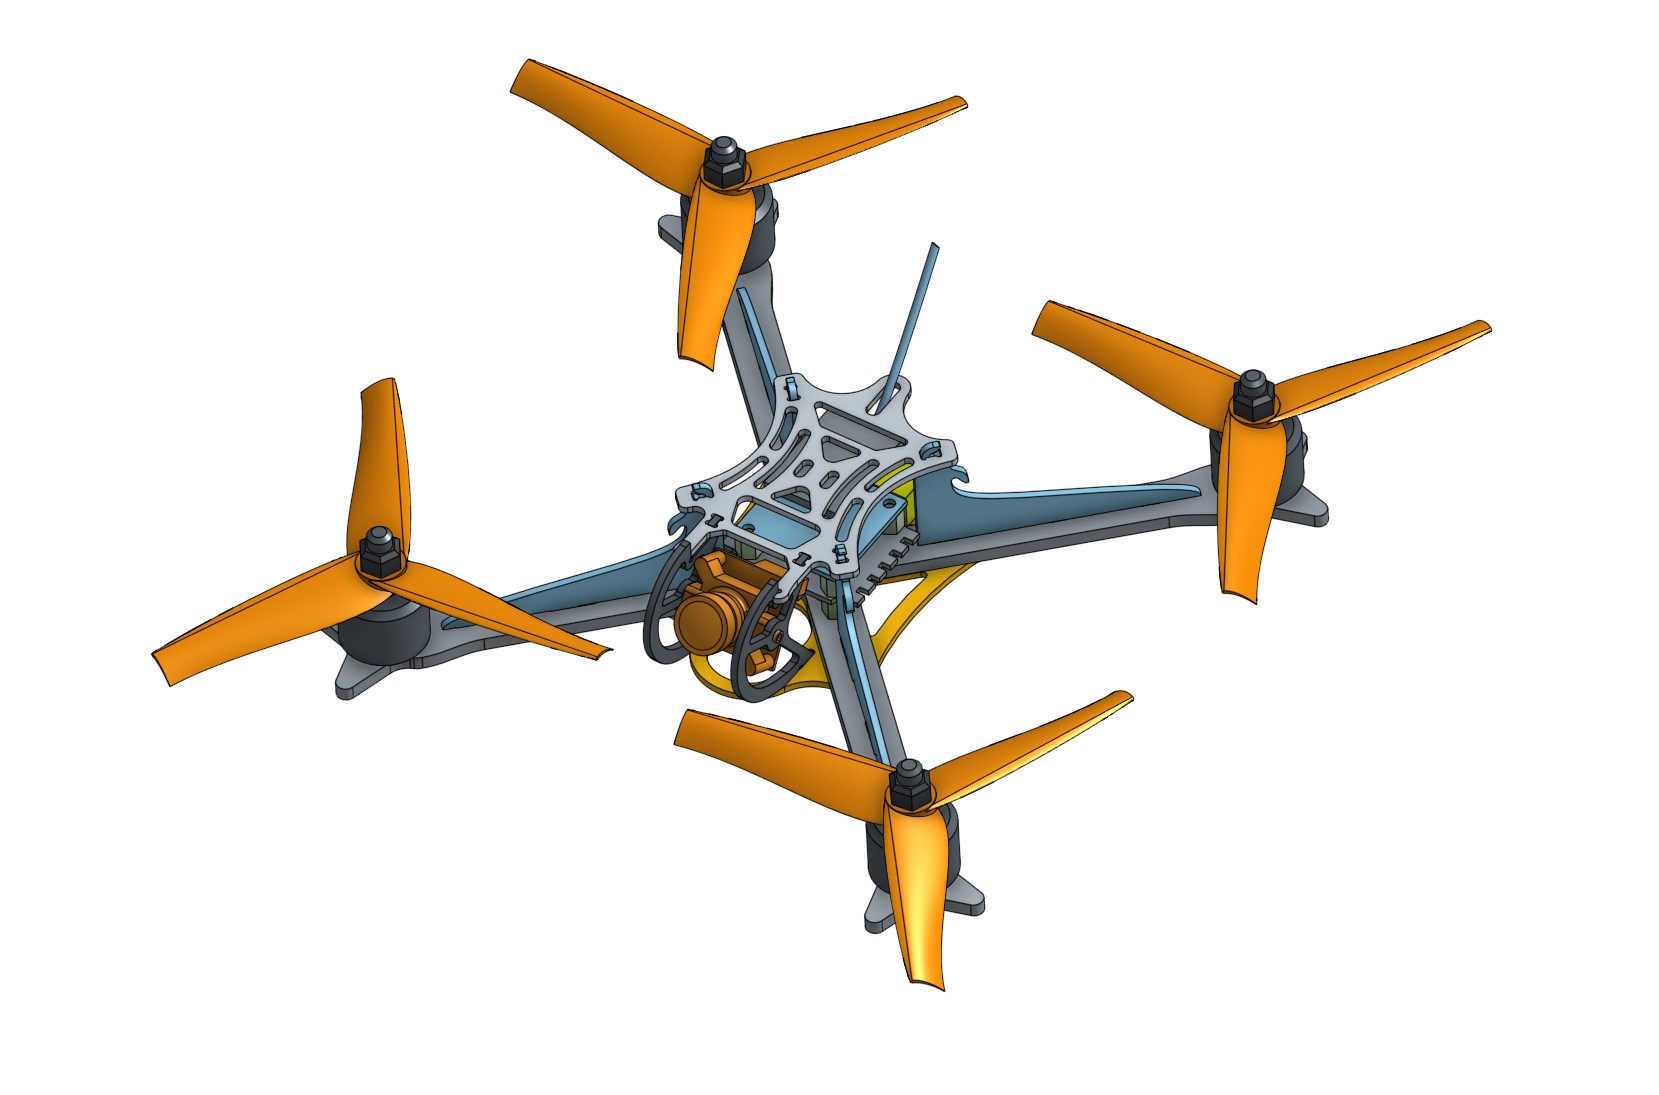
$ 26.55When thinking about the pros and cons of vertical arms this idea striked my mind: Combine vertical and horizontal arms to form a T-Beam. I started designing a frame for a 4" ultralight (<250g all-up-weight) with easily interchangable arms, minimal weight and maximal durabiliy in mind. Ok, fair enough, this is probably the goal for most frames out there, but I think this approach is pretty different and I'm quite happy with how it turned out! The T-Beams give the frame an incredible amout of stiffnes and good durability, especially considering the weight of only 33g. And the design is completely open-source, you can take a look here. (You need to create an account to watch it :/ But it's worth it)
This frame allows you to build a Quadcopter with 1407 Motors, 20x20mm Stack, Micro-Camera and a 4S 800-850mAh Battery under 250g AUW! It has an insane amount of power and feels really agile in the air. I used the Rotorgeeks motors and HQ 4x4.3x3 V1S. This is a perfect combination I think and those props are just awesome.
A few notes about the design.
-The T-Beams should be glued into the arm with epoxy
-The Top-Plate is held in place by rubber bands/big O-Rings using eiter the hooks on top or a little furter down. Initially I used long screws which went alls the way through the frame but then dropped this idea because it was just not practical. However, if you like to, you can just load version 0.10c in Onshape
-The screws for the AIO-Stack are also used to hold the arms in place
-If you remove the Top-Plate and the corresponding screw the arm(+T-Beam) can be easily slid out and exchanged
-The hole pattern for the motor needed to be rotated in order to allow the cables to run besides the T-Beam. Also just 3 screws are used to secure a motor. This is more than enough in my opinion.
You probably want the cables to run protected by the T-Beam on the inner side, so front and back motors are rotaded in different directions. As you can't flip an arm once the T-Beam is glued in place, there are 6 holes in each arm to allow for clockwise and counter-clockwise rotation.
-The XT60 (or XT30) has a designated spot at the back of the Bottom-Plate to allow for clean cabeling.
-Put some foam on the bottom to prevent the screws scratching the battery
One issue with the design are the tight tolerances and so far I made everything a little tighter than it needs to be and used sandpaper if something didn't fit. You can change the tolerances using the global variables in Onshape.
Last but not least I want to note than the resonance frequency of the frame is 300Hz. This is pretty low, so there are no mid-oscillations, but there is a funny noise whilst whilst idling.
Best regards
AdrianPS: I really want to thank my dear friend Jonathan Knirsch who intruduced me to Onshape and who did the inital version of this frame! And to KababFPV who came up with this design of the arm ends on his Floss Frame.


